Creating a dataset : Step-by-step instructions
Licensed according to this deed.
Category
Published on
Abstract
Follow these instructions to build a dataset for your research data.
| Step | What to do | When to do it | More details | Screenshot |
| Step 1 | Register | one time | You must be registered to create your own dataset. However, any user can explore the published Public Datasets | |
| Step 2 | Log in | every time you want to work on your datasets | You must be logged in to create your own dataset . However, users do not have to have a login to explore the published Public Datasets. You may choose the option to stay logged in. |  |
| Step 3 | Explore available datasets | at least once to get familiar with the platform | Go to DataCenterHub and select DATA > Discover Users can explore published Public Datasets here. Hover pointer over column headers for column definitions. |
|
| Step 4 | Create your dataset | when you want to create a new dataset for your research data | Go to DataCenterHub and select DATA > Create You will see a box where you need to enter a title for your dataset. Once you provide a title for your dataset and click Create Dataset, you will see a dashboard with three main sections: Experiment or Case Information Experiment or Case Files Experiment or Case Parameters Each experiment (or case) refers to an activity (physical test, simulation, survey, etc.) in which the response of an object or specimen to defined input/excitation is documented. |
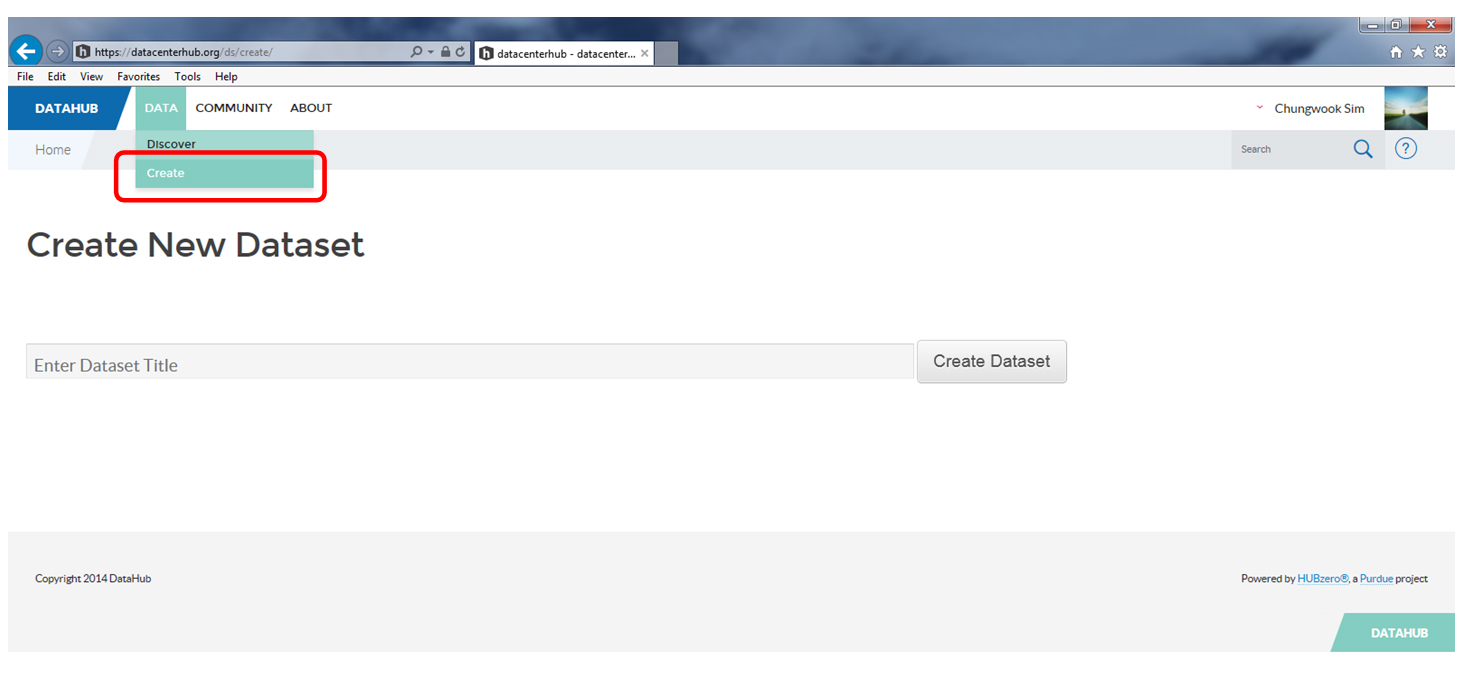 Create dataset 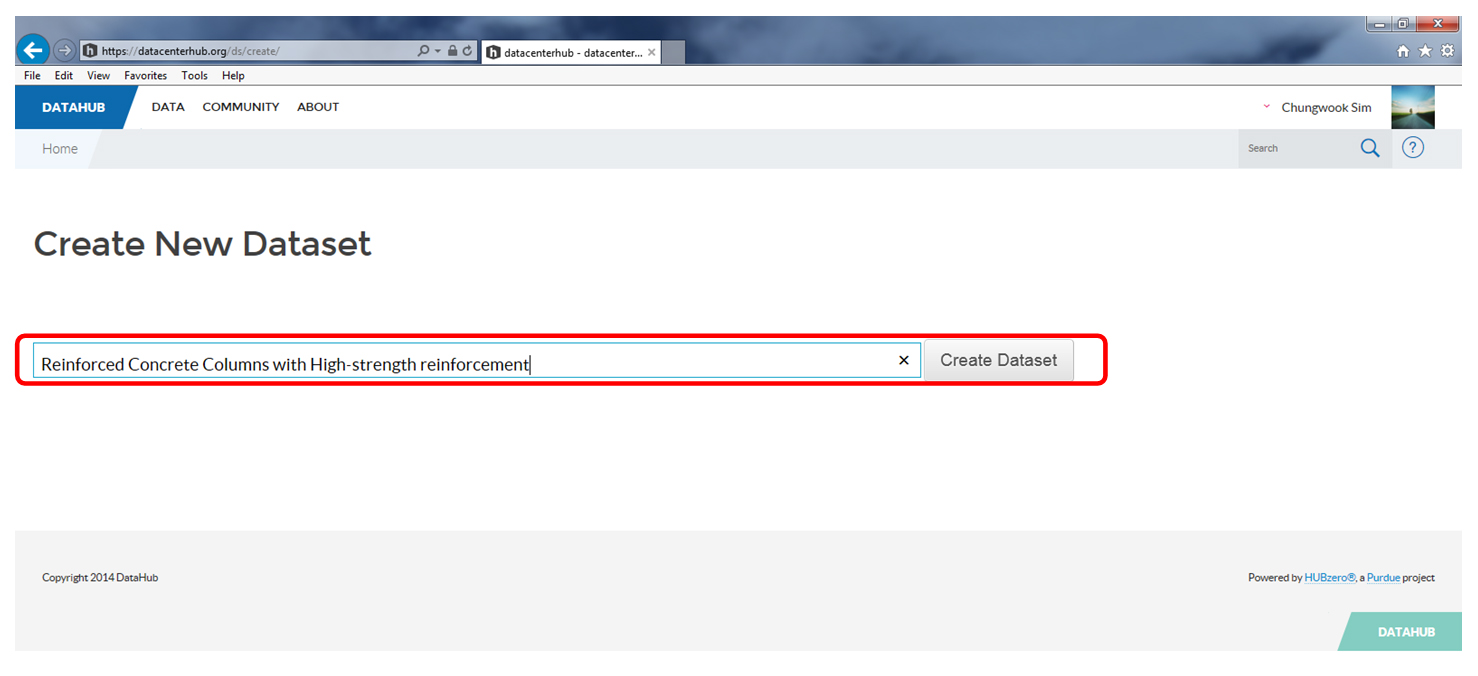 Enter dataset title 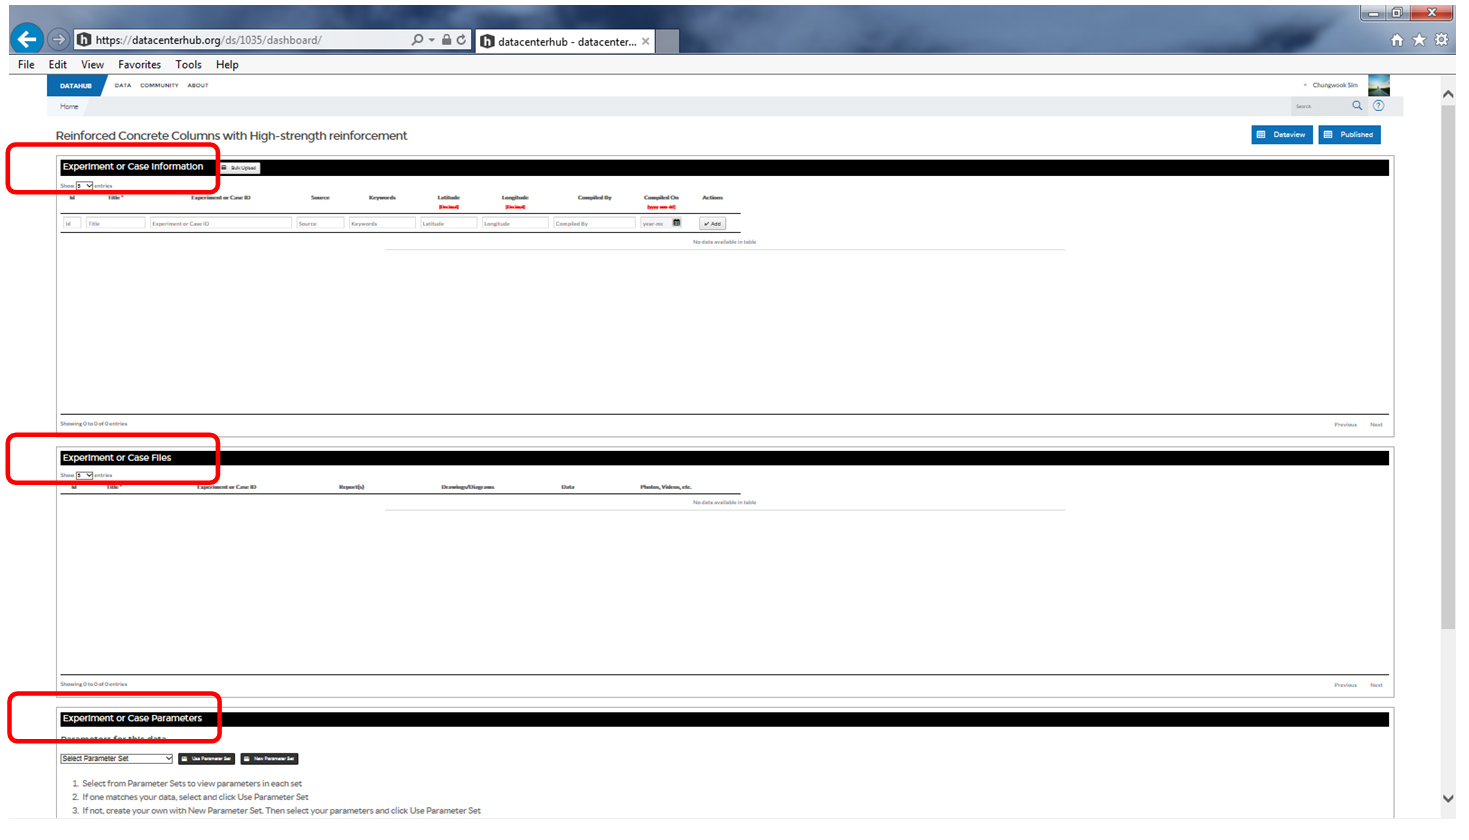 3 main sections |
| Step 5 | Add Experiment or Case Information to your dataset |
for each new experiment or case | Experiment or Case Information refers to generic information that others can use to find your dataset in the repository. Provide a Title for each experiment. This is not necessarily the same as the title of the Dataset. It is the title of the project or group of experiments from which each experiment is obtained. Experiment or Case ID is the ID assigned by the source(s) to the experiment. Source refers to the name(s) of the person(s) who recorded the data. Keywords are words describing the dataset. Users search for specific experiments in the repository with these keywords. Latitude and Longitude are the coordinates of the location where data were recorded. These are not needed for simulations. Compiled By refers to names of the people who compiled the data. Compiling refers to organizing the data into a dataset as opposed to recording the data during the experiment. Compiled On is the date when the dataset was compiled (format: YYYY-MM-DD). There are two ways to fill in, add, update, or delete information. One way is through the Experiment or Case Information web interface. Use the Add button under the Actions column to add experiments. Once you have added an experiment you may update it by clicking on the entry you need to update. You may also delete an experiment with the Delete button under Actions. Another way is through the Bulk Upload on the Experiment or Case Information title bar. Use this button to upload a CSV format spreadsheet in three steps:
Add & Update only will update experiments with matching system-generated IDs and add new experiments (without system-generated IDs). Add, Update & Delete will update experiments with matching system-generated IDs, add new experiments (without system-generated IDs), and delete previously entered experiments not included in the CSV file being uploaded. |
 Experiment Title 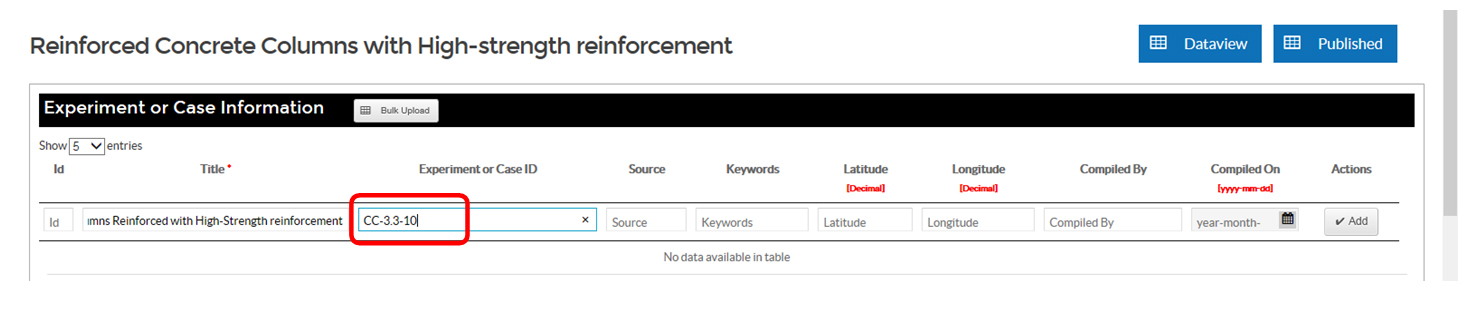 Experiment or Case ID 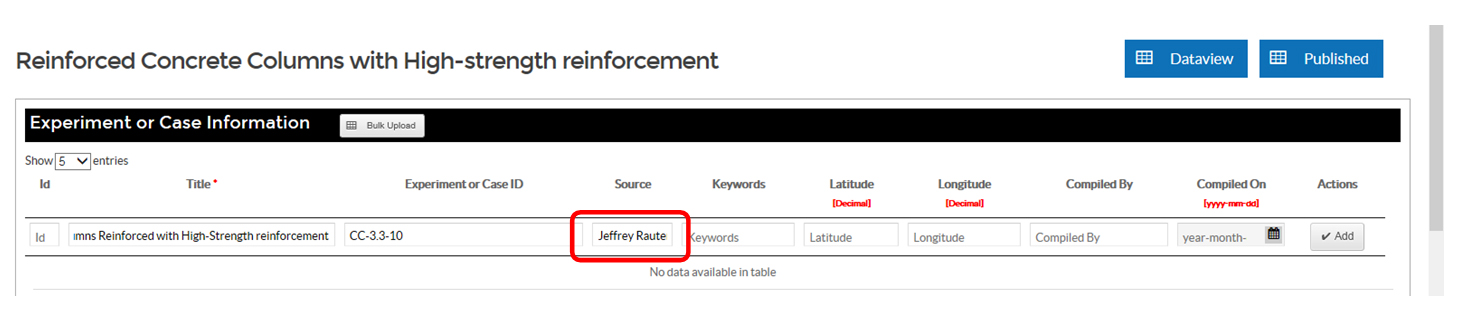 Source  Keywords 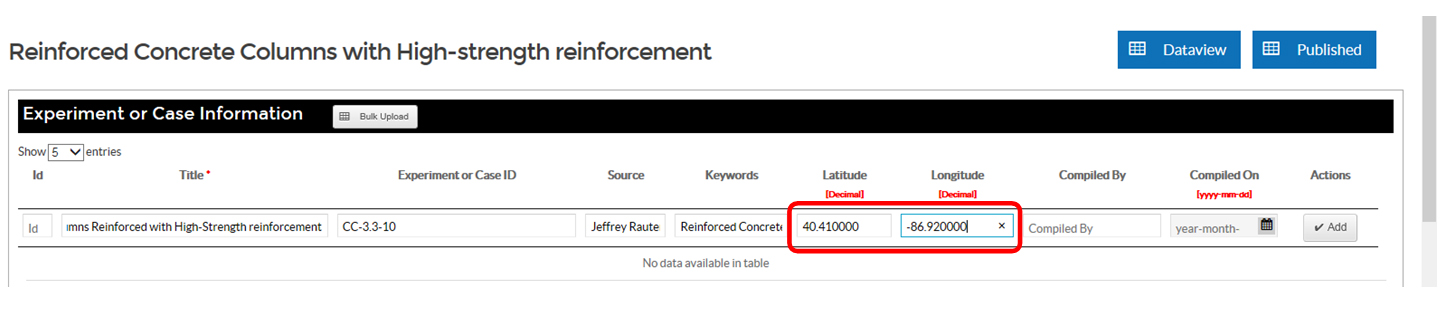 Latitude and Longitude 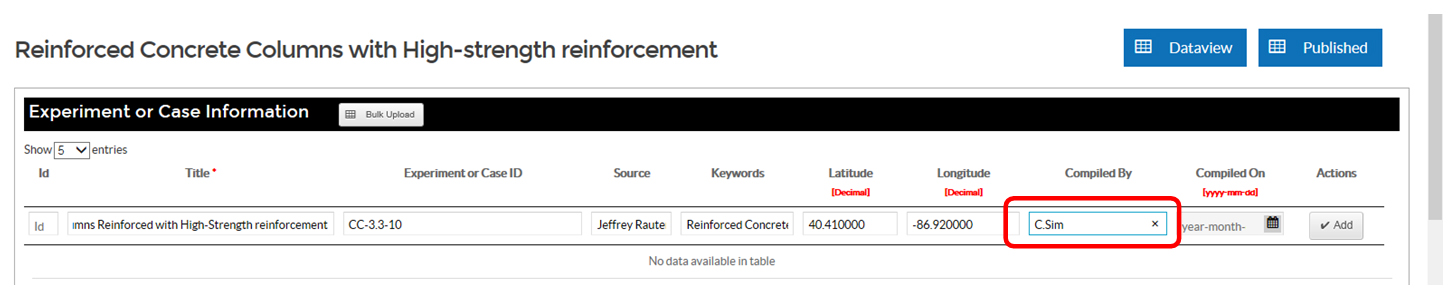 Complied By  Compiled On 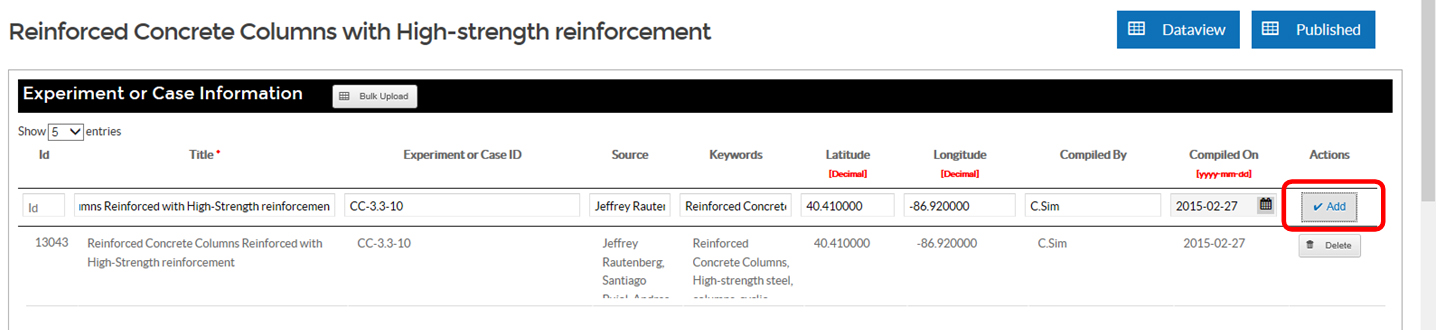 Add  Bulk upload  Get CSV file 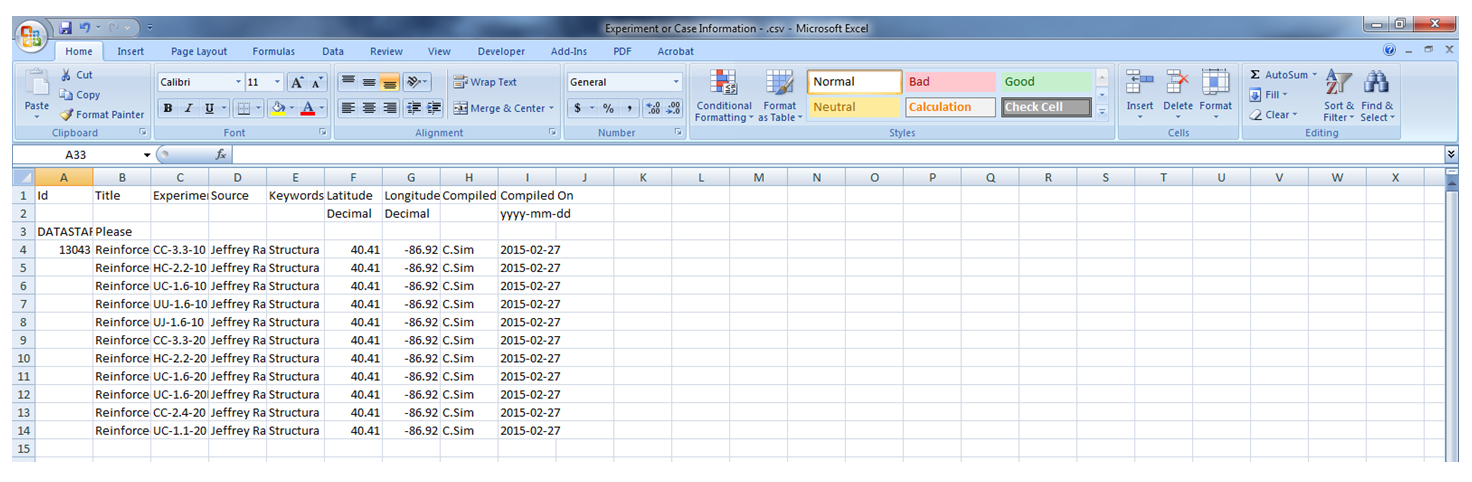 CSV file format  Add & Update only 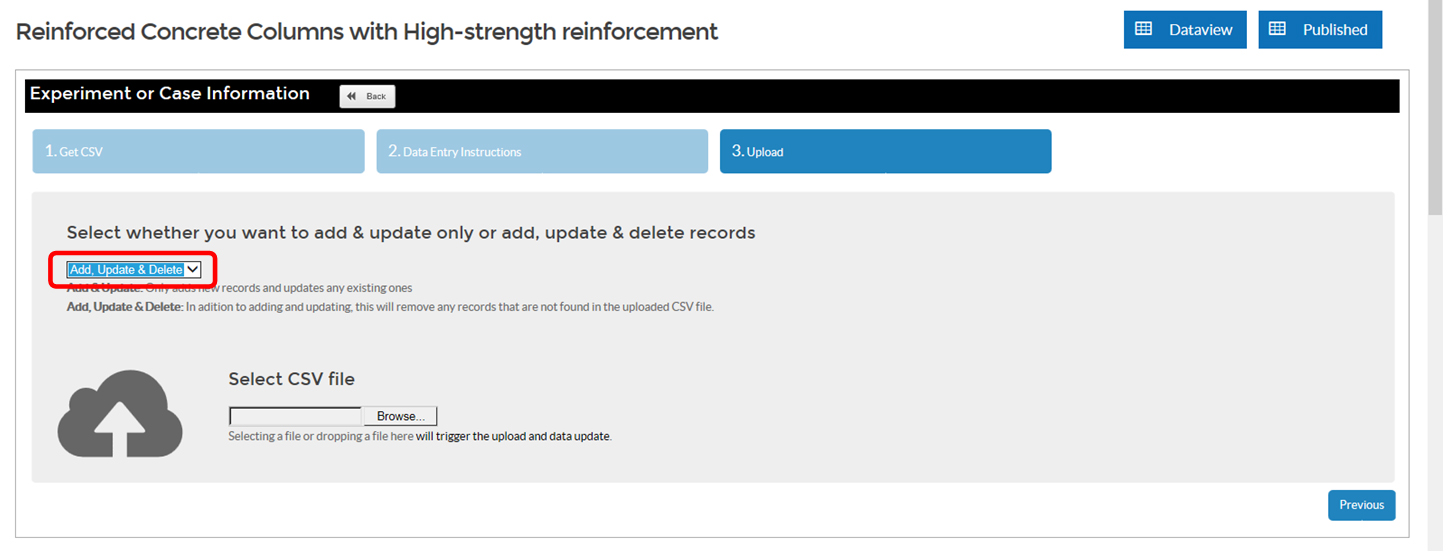 Add, Update & Delete 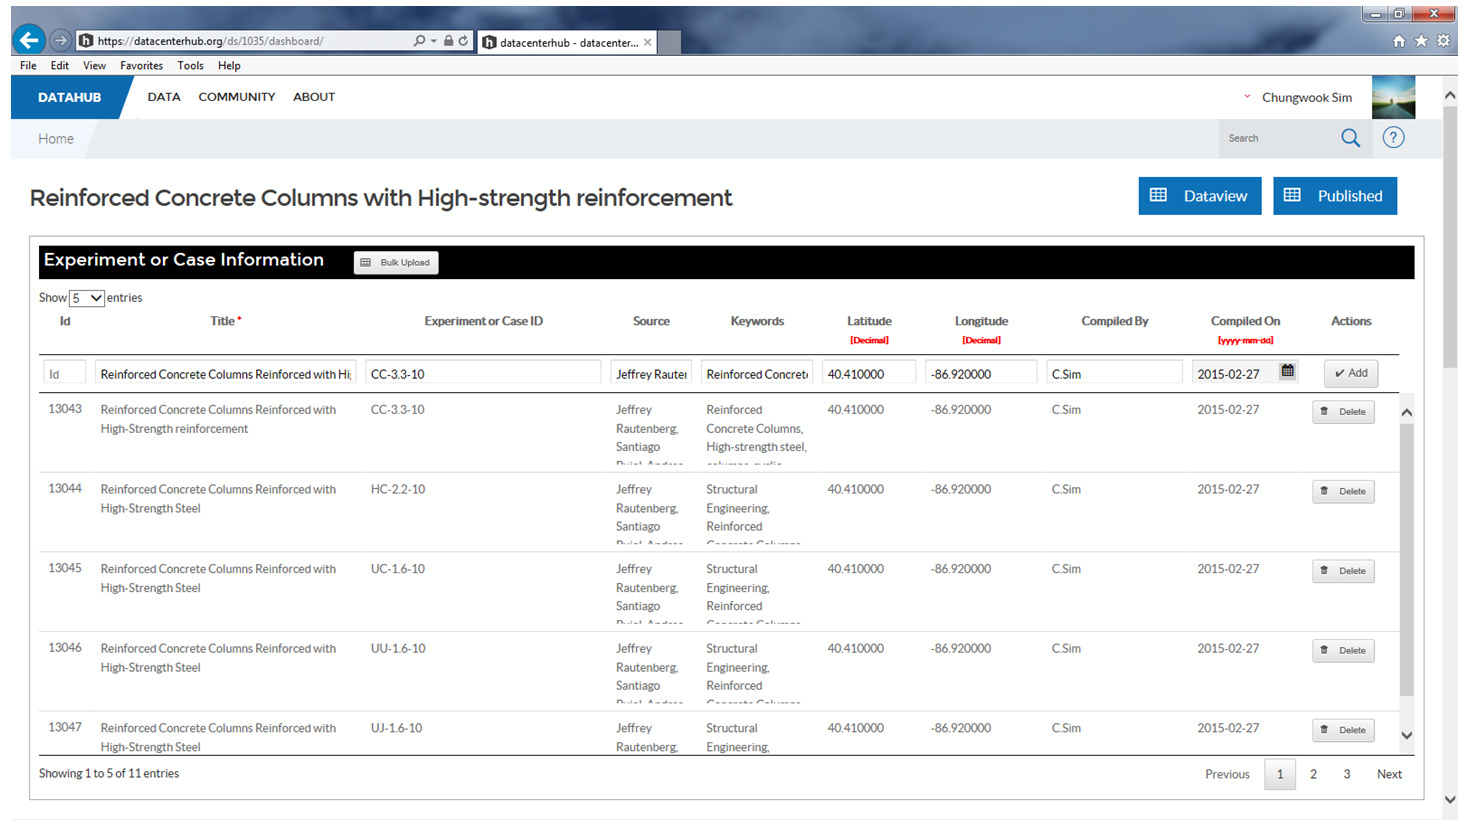 Experiment information added |
| Step 6 | Upload Experiment or Case Files |
to upload or manage research data files including reports, drawings, data files with measurements, photos, videos, and audio collected during research | Files of different types (reports, drawings, measurements, photos, videos, audio, etc.) are generated with each experiment. DataCenterHub has been designed to help you organize and preserve these files. They are grouped through the Experiment or Case Files interface as follows: Report(s) are the documentation related to the experiment. Drawings/Diagrams are the image files that are needed to interpret the data, including drawings illustrating the test set-up and the specimen or site. Data include files (preferably in text format, e.g. *.txt, *.csv) with measurements and observations. It is recommended that data files are organized in columns with each column having a descriptive header (e.g., sensor ID, and units). Material sample tests may be stored here. Photos, Videos, etc. are the media files including photos, videos, audio generated through research. There are two ways to add, or update files to Experiment or Case Files. One way is through the Experiment or Case Files web interface. Drag & Drop the file onto the Upload Files button. Another way is to click Upload Files and select the files with a file explorer. When you want to add descriptions to the files uploaded or would like to add or delete files, click Manage to update and annotate the files. Annotations will be visible to users and will help them select files in large file groups. Investing time annotating files will help others use your data. |
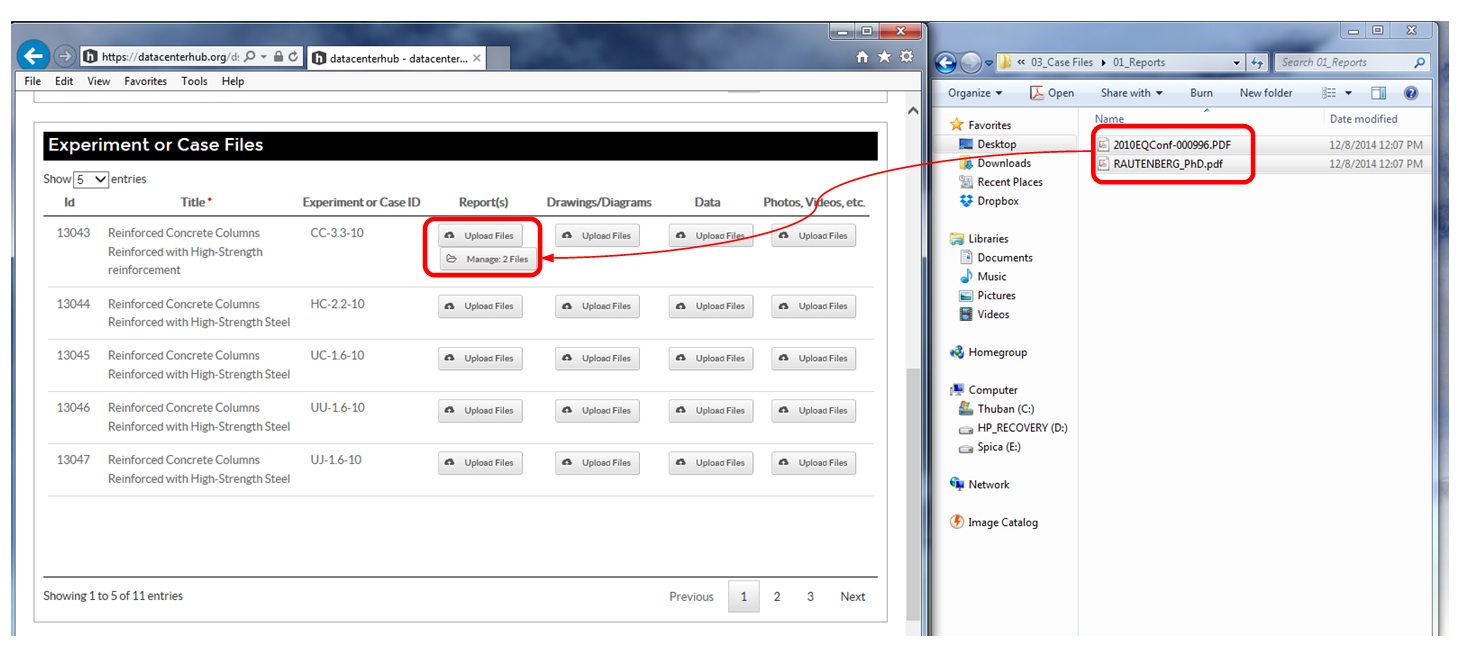 Upload Reports 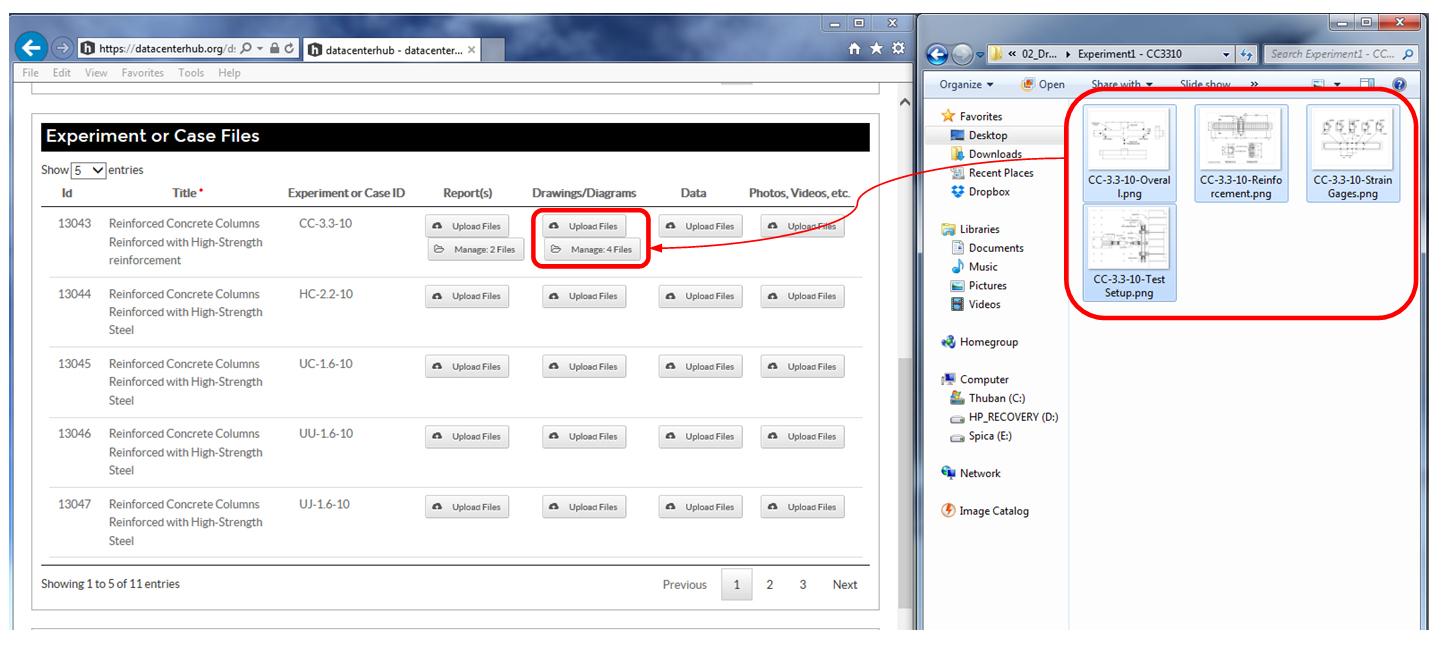 Upload Drawings 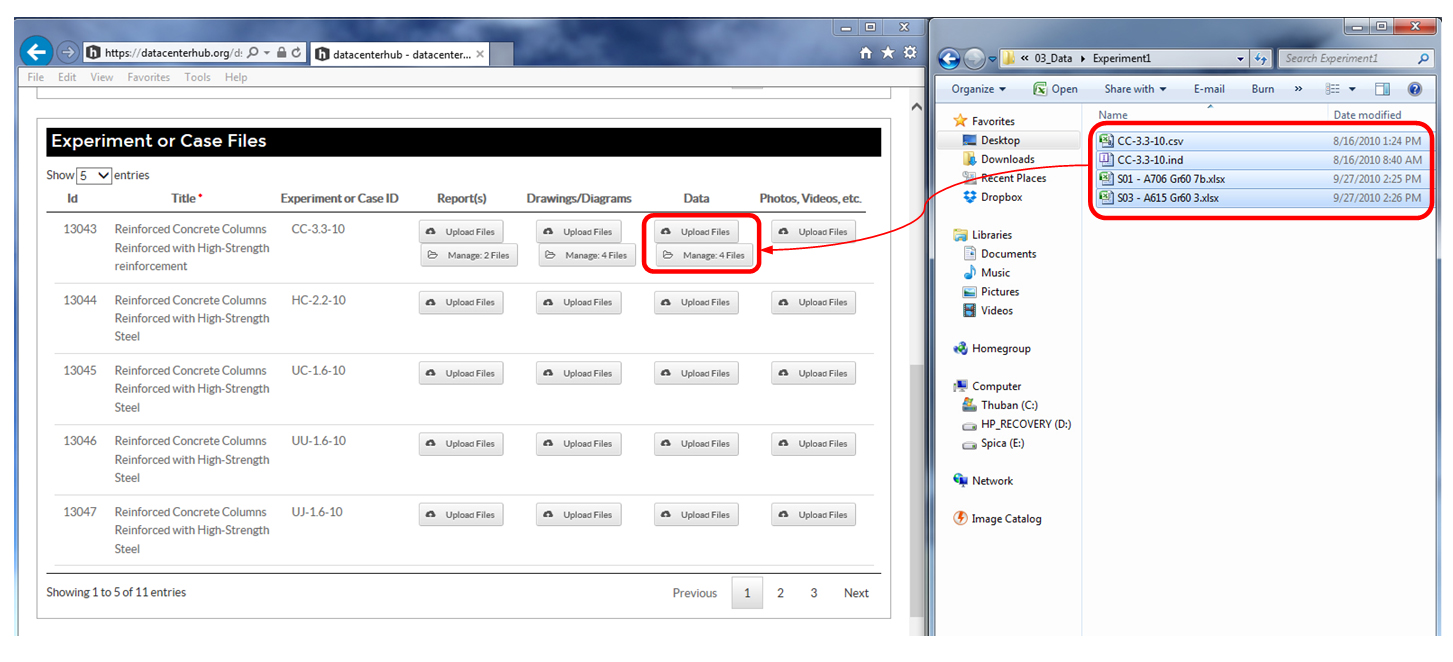 Upload Data files 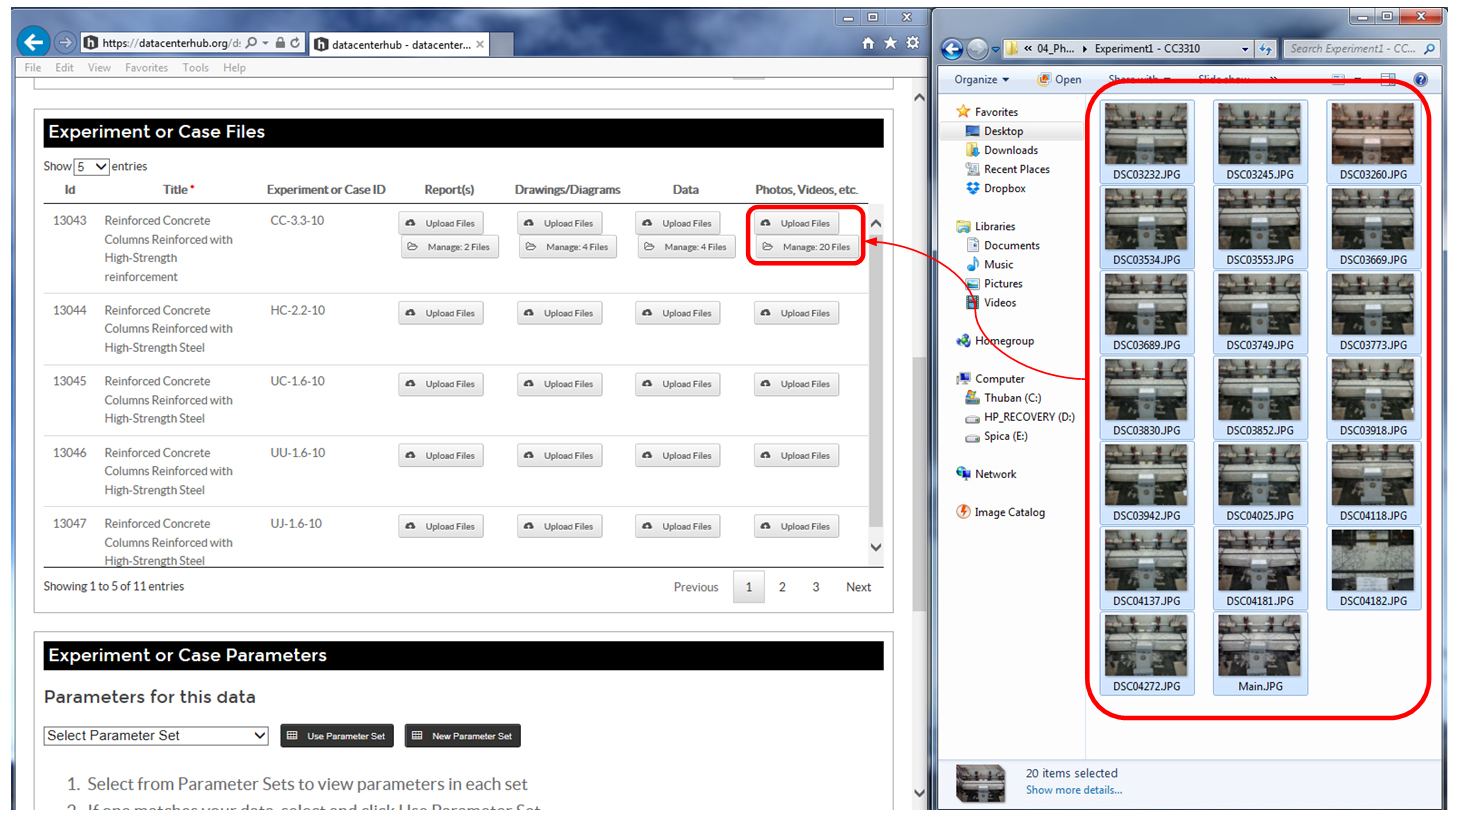 Upload Photos |
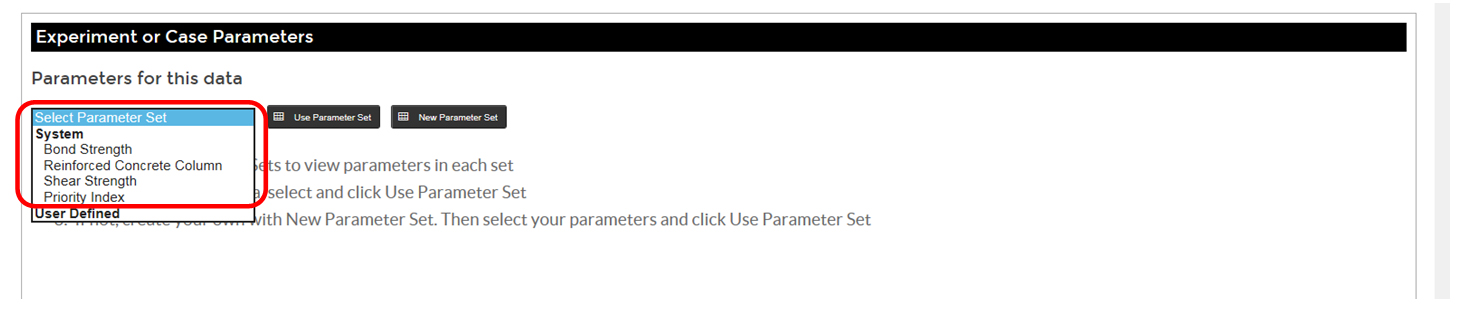
| Step 7 | Add Experiment or Case Parameters |
to upload or manage the parameters used to describe the experiment | The Experiment or Case Parameters interface helps you define parameters (variables) that the researcher, compiler, professional or scientific organization chose to describe the experiment in quantitative terms. Examples may include dimensions, material properties, temperature, key test results or indices, etc. Click the drop-down menu from the Select Parameter Set to see the available pre-defined parameters. Ideally, these would be defined by professional organizations through consensus among experts. Using a pre-defined parameter set helps compare your results with other results. If you find a parameter set that corresponds to your data, select it and click on Use Parameter Set. For flexibility, you can create your own list of parameters by clicking New Parameter Set. There are three steps to define your Parameter Set:
If you do not like the parameter set you chose, click Reset and redo step 1 to 3. Whether you used a system-defined or user-defined parameter set, you can input values for your parameter set in two ways (this works just like Experiment or Case Information – and we repeat the details here): One way is through the web interface. Use the Add button under the Actions column to add experiment parameters. Once you have added an experiment parameter you may update it by clicking on the entry you need to update. You may also delete an experiment parameter with the Delete button under Actions. Another way is through the Bulk Upload on the Experiment or Case Parameters title bar. Use this button to upload a CSV format spreadsheet in three steps:
Add & Update only will update experiment parameters with matching system-generated IDs. Add, Update & Delete will update experiment parameters with matching system-generated IDs and delete previously entered experiment parameters not included in the CSV file being uploaded. |
 Pre-defined parameter set 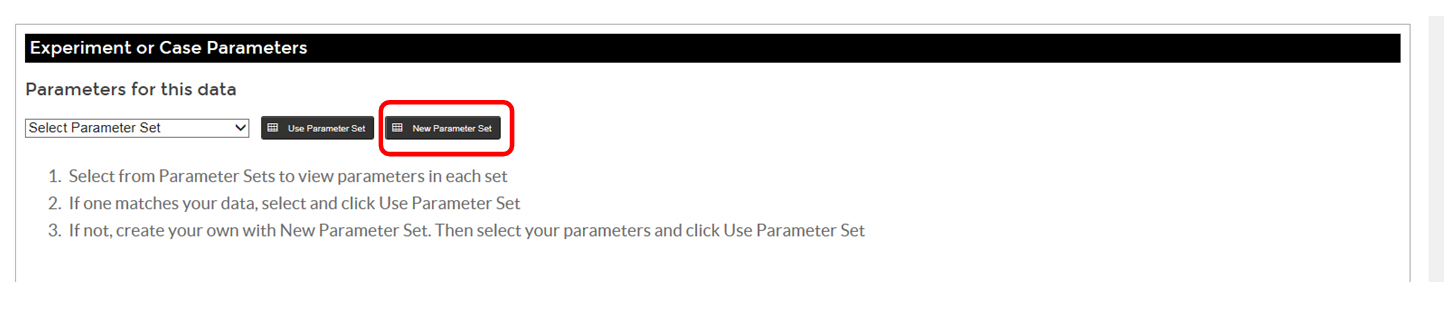 New parameter set 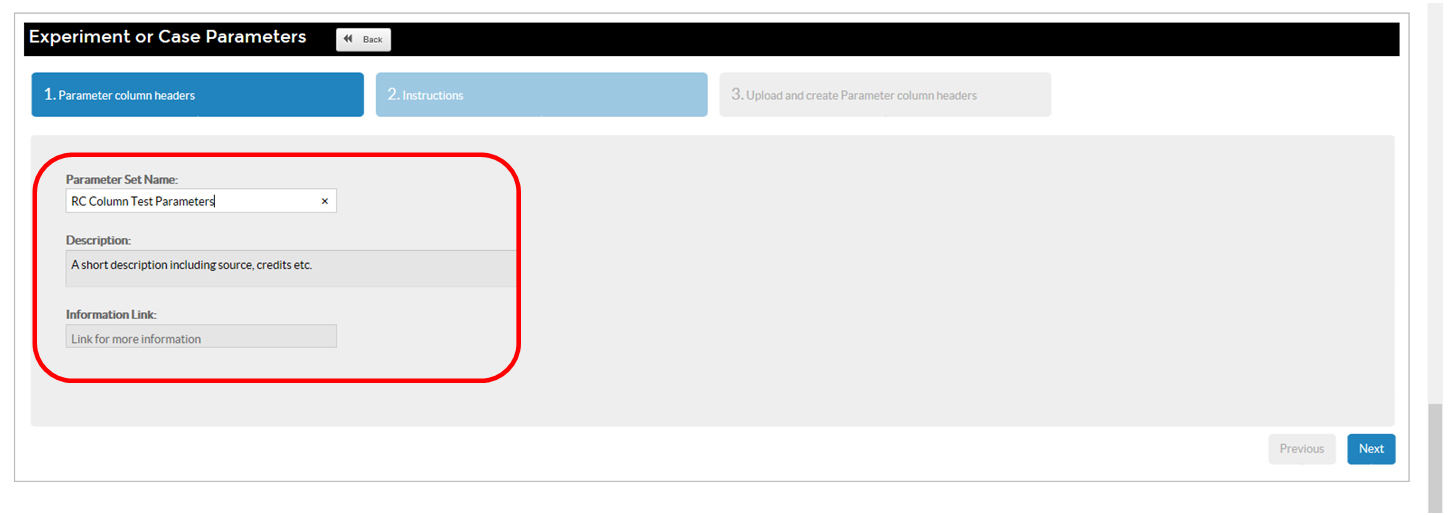 Parameter set name 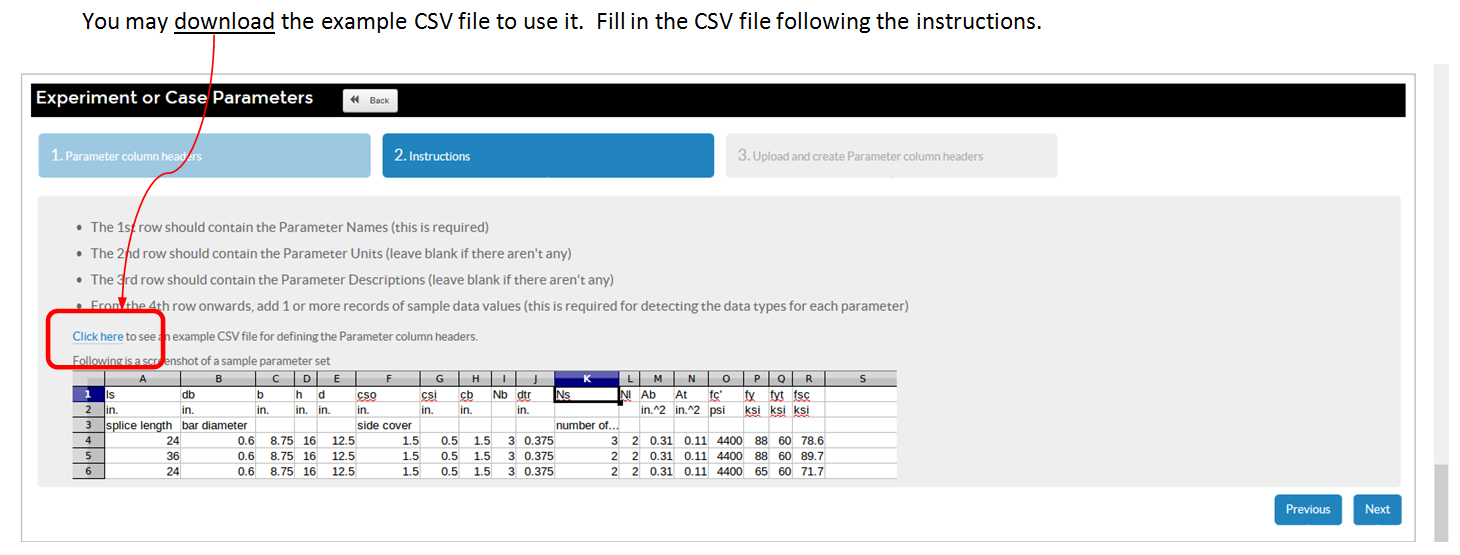 Parameter file instructions 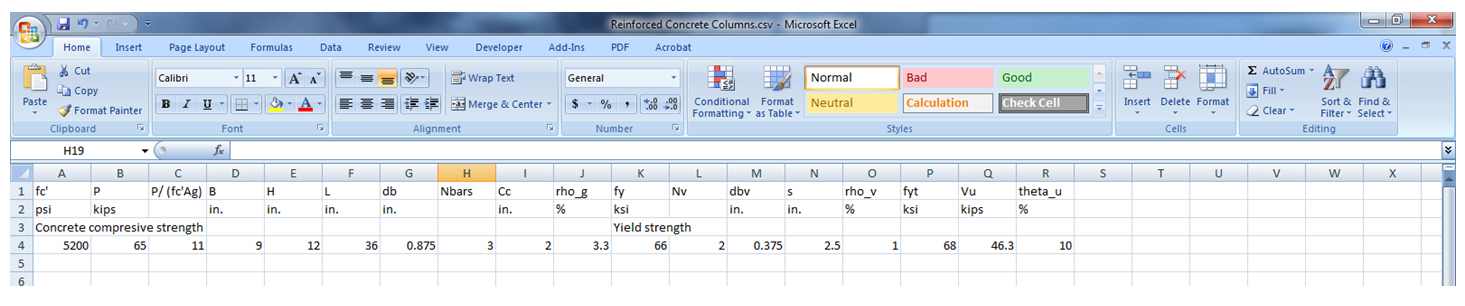 Parameter CSV content 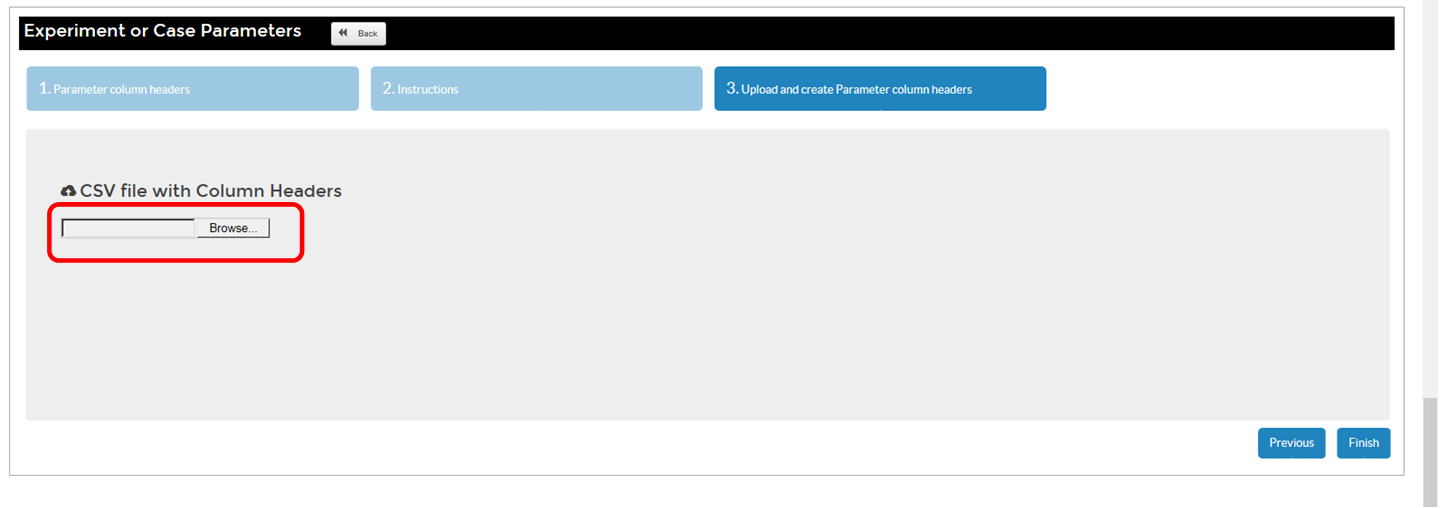 Upload parameter headers  Select user-defined  Use Parameter Set 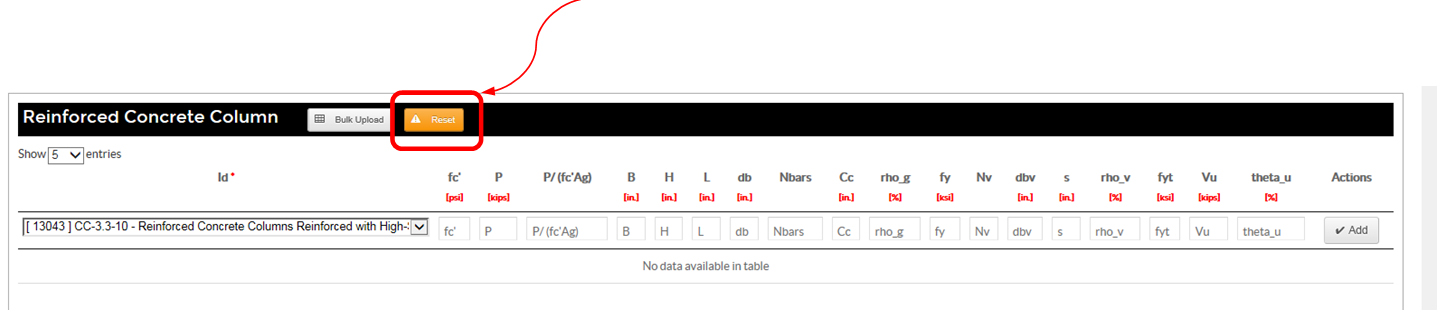 Reset  Bulk upload 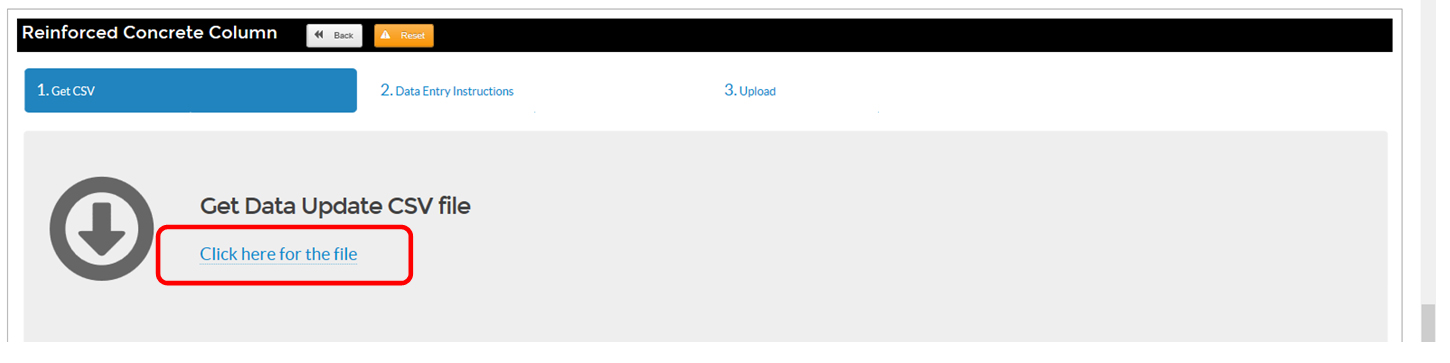 Get CSV for upload 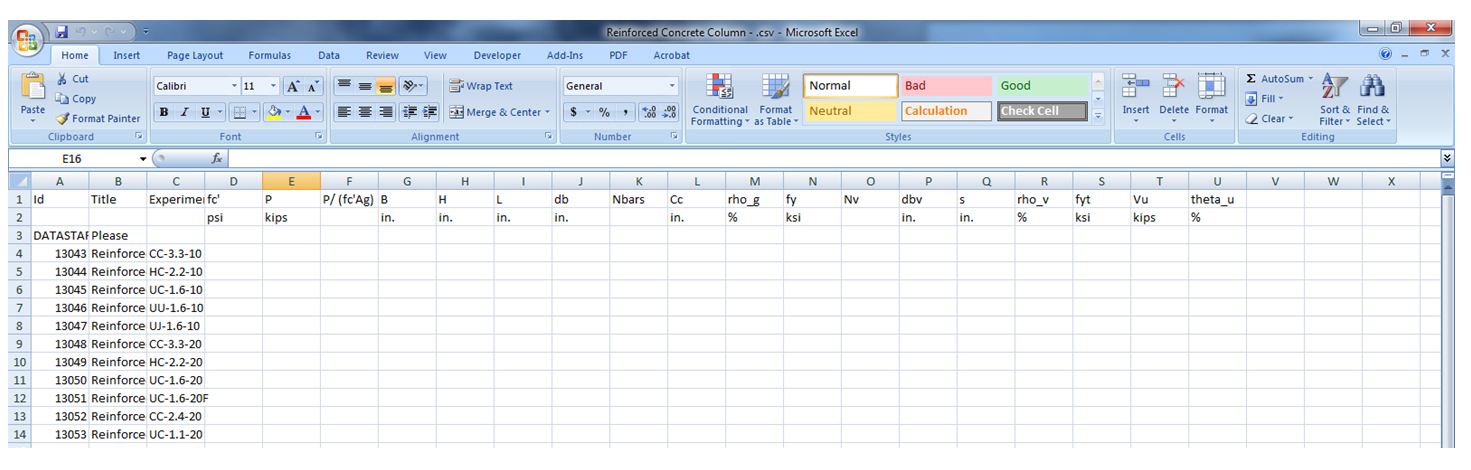 Parameter data file  Adding data to file  Data file uploaded 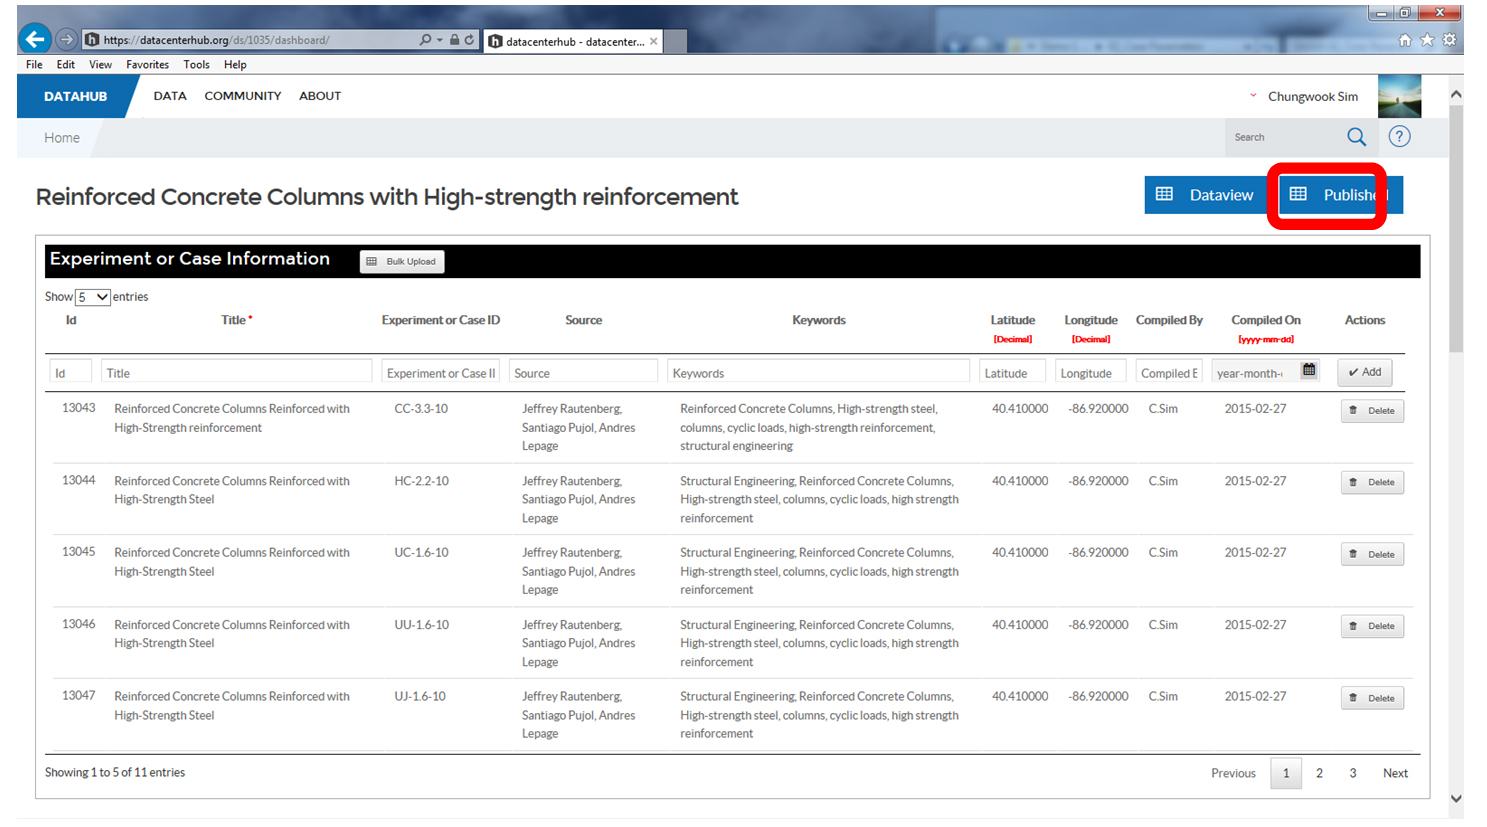 Ready to publish! |
Cite this work
Researchers should cite this work as follows: